Monday, December 27, 2010

Tuesday, December 21, 2010

Winter Wonderland

Recently we had some snow in Atlanta.  It may have only been a few flurries, but it definitely got me excited for winter! 

Some people may feel that weddings should be in the Spring only, but that is definitely not the case!  Here are some tips and pictures for a Winter Wonderland Wedding.


  • The Dress: Don't feel like you can't wear a strapless or 'Spring' wedding dress in the Winter.  As long as you feel comfortable and beautiful in your dress, that is all that matters!  Just make sure you have a winter muff and/or shawl to keep you warm.  If you're still worried about being cold, just go with a thicker fabric for your dress.


  •  The Drinks: During the cocktail hour, offer some warm drink options.  This will keep with the theme and warm people up as they arrive at the venue from the wedding.  Some ideas include warm cider with rum, hot chocolate with peppermint schnapps.  (Check out Delish for more ideas)  Keep the drinks during dinner and the reception standard with wine, beer, mixed drinks.  You don't want to go overboard with the Winter theme and sweet drinks.

  • The Ride: Every little girl dreams of finding prince charming and riding away into the sunset with him.  (a la Cinderella).  For a truly fairytale winter wedding, why not have the get-away 'car' be a horse drawn carriage.  It plays up the theme and adds to the romanticism of the wedding.  Make sure the carriage is equipped with warming blankets and hot cocoa!

                                      
  • Favors: With a Winter wedding theme, there are a lot of cute ideas for the guest favors.  Provide each guest with an Ornament with their name or initials or have a nice hot cocoa mix with marshmallows wrapped to go.  Another option is holiday cookies with your new monogram; guests always love a snack at the end of the night after dancing the night away.

For more ideas, check out theknot.com and their 10 Winter Wedding Ideas!

Tuesday, November 23, 2010

A Royal Wedding, Part 2

A date has been set for the big day, April 29, 2011.  The Prime Minister has also announced this day will become a public holiday for Brits!

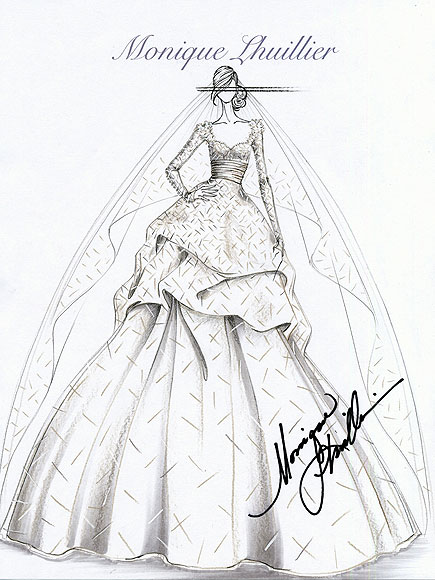
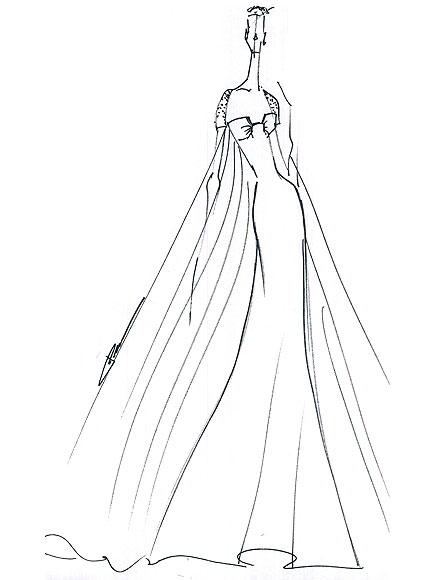
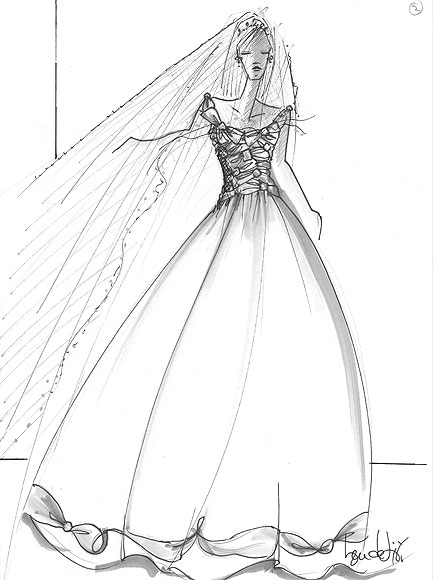
With the date only 5 months away, the planning will have to begin immediately.  Designers have already sent sketches for Kate's dress.  Which is your favorite?

Monique Lhuillier - My personal fav


Reem Acra


Ben De Lisi


Photos courtesy of People Magazine.  Click here for more photos on People.com

Monday, November 22, 2010

DIY: Oreo Groom's Cake

Need a cheap and unique cake idea for your Groom's cake?  Here is a simple idea that won't cost you much at all!

Oreo Cookie Cake


What you need:
  • 20 or so packs of Oreos (you may need more depending on the size you want)
  • Circular Cake Stand/Platter
  • Small Shot Glasses
  • Milk
Steps to Create the Cake:
  1. Begin stacking oreos on platter
  2. Stack oreos 5 high to fill the entire bottom of the platter
  3. For the next layer of 5, place the cookies about halfway in on the edge of the layer below
  4. Continue stacking layers 5 cookies high for as many layers as desired.  We made 4 layers, but you can have as many as you'd like.
  5. Place the shot glass around the table and add milk
Liz creating the Oreo cake at Frances & Chris' wedding 

No cutting needed, just grab a cookie and shot glass of milk and enjoy!

For additional tips and ideas, see Martha Stewart where we got our inspiration for the cake.

Tuesday, November 16, 2010

A Royal Wedding

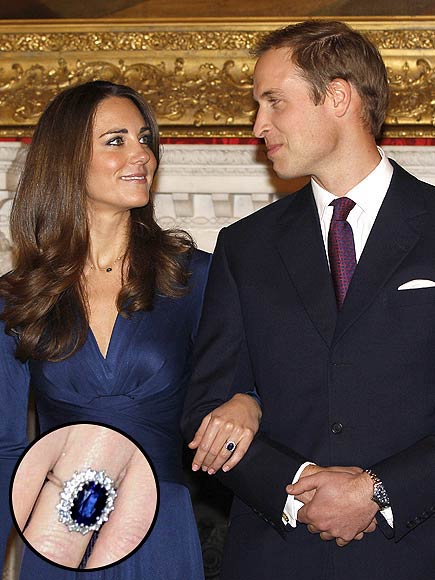
It was just announced that Prince William and Kate Middleton are engaged!  There goes the dream for all us 'normal' girls on becoming William's Princess...

LOOK OF LOVE photo | Kate Middleton, Prince William

There is already speculation that this wedding will be 'the biggest royal wedding since Charles & Diana's wedding'.  I can only imagine how fun it would be to plan such a large, real life fairytale wedding!

Photo from People.com

Thursday, November 11, 2010

DIY: Welcoming Out of Town Guests

Do you have a large number of your guests traveling from out of town for your wedding?  Here is a cute idea to welcome your guests!


 To create a sign like this, follow these steps:

Supplies:
-Wood Planks (Try fence panels from Home Depot)
-Two 2x4 wood boards cut to size for posts
-Wood stain or shoe polish
-Nails
-Hammer
-Sandpaper
-White paint or chalk

  1. Cut your fence panels or wood planks to the size you would like (2-3 ft. is a good length depending on number of locations you will add)
  2. Using the hammer, nails, sandpaper, etc. begin to 'age' the wood on the edges and across the planks
  3. Use the wood stain or shoe polish and stain the panels/planks  Note: You can always add more 'age' to the wood after staining
  4. Once the stain has driec, line the boards up on the ground and using the white paint or chalk, write out the places & distances traveled by each guest.  Tip: Draw this out on paper first to make sure you know where you want everything placed on the sign.
  5. Once the boards are dry, turn them over and nail the 2x4's to the panels to keep them together and to add the legs to the sign.

Simply find a location at your reception site for the sign and put it in place.  Guests will love this personal touch welcoming them to your wedding!


Photos courtesy of KariBeth Gentry

Monday, November 1, 2010

DIY: Fall Centerpieces

Planning your Fall wedding on a budget?  Here's a simple and creative idea for centerpieces that won't cost you much at all.  We put these together for Frances & Chris' wedding a few weeks ago and they turned out great!


What you need: (be sure to look around your house and ask friends for these supplies, you'll probably find almost everything!)
-Large glass vases in all sizes & shapes
-Pillar candles
-Votive candles & glass holders
-Ribbon in various colors
-Pine cones
-Spray paint - gold, silver, bronze
-Marbles, acorns, potpourri, sticks, etc.
-Any other fillers for the vases
*Make sure that the candles, ribbons and fillers match the color scheme for your wedding or party!

 
What to do:
  1. Spray paint the pine cones in gold, bronze and/or silver to add a little extra color.  Leave some natural as well.
  2. Place the pillar candles in the center of the vases with marbles, acorns, etc. around the candle OR simply fill the vase with one of the fillers and leave out the candle.  It's good to have a mix!
  3. Put the vases in the center of the tables
  4. Place pine cones around the large vases.  Don't add too many or the table will look cluttered.
  5. For the vases without candles, place the votives in their holders around the large vase
  6. For smaller vases, you can add ribbons for extra color
  7. Spread out the rest of your votives around the vased on the tables as you see fit
And there you go.  You have your simple and cheap, yet beautiful centerpieces for your Fall wedding!


Also check out their facebook page: http://www.facebook.com/jettefagelaphotography

Thursday, October 28, 2010

Frances & Chris' Big Day!

Two weeks ago, on October 16th, Liz and I helped to plan and coordinate a wedding for a couple, France and Chris, who were referred to us by a friend (thanks Talia!).  The wedding could not have been more beautiful.

The wedding and reception were both outdoors at the Cator Woolford Gardens on a wonderful Fall evening and it was truly a family affair.  Frances' brother made the cake and her mom made the dress.  Everything came together perfectly, from the dress to the colors to the decor as you can see in the pictures below!

Congratulations to Frances & Chris!

The beautiful couple saying their vows.

The programs had a crossoword puzzle about
the couple on the back.  Such a cute idea!

The cake designed by Frances' brother, Alex,
was a perfect match for the Fall colors and decor.

The 'gift' was a self-serve candy bar.


Also check out their facebook page: http://www.facebook.com/jettefagelaphotography

Friday, October 22, 2010

Welcome!

Welcome to our new blog!

Something Old, Something New was created by Liz about 4 years ago after planning her own wedding and I jumped on board a year or two ago.  We are two sisters who love planning weddings and making people's dream wedding come to life!  We've really grown the company recently and are very excited for what the future holds.

We're new at this blog thing, but will try our best to make it interesting and fun for all our readers... even if that's just our family and friends, who are our biggest supporters!

Check back for weekly advice and tips on planning your wedding.

Also, be sure to check out our website: http://www.sosnatl.com/ and Facebook page: www.facebook.com/SOSNWeddings